How to Clear the WordPress Cache to Refresh Your Site

Clearing the WordPress cache is the corrective action needed to synchronize your recent changes with the public display. By clearing the layers of data stored on the server or in the browser, you remove outdated versions and improve loading speed. This helps maintain a smooth user experience and preserve your SEO performance.
The WordPress cache reduces server response time by storing temporary copies of your files. However, this technology becomes a hindrance when your site continues to display old versions after a visual or textual update.
This delay between your changes and the actual display frustrates your visitors and complicates your editing work. I’ll walk you through the process step by step so you can learn how to clear your WordPress cache effectively and keep your content up to date.
Why Clearing the WordPress Cache Fixes Display Issues
Clearing the WordPress cache resolves display conflicts by forcing the generation of new HTML and CSS files. This process, which is useful after every update, aligns what the user sees with the data stored on the server. In fact, the cache isn’t a single block but a set of distinct layers.
Distinguishing Between Page Cache, Object Cache, and Browser Cache
The page cache stores the final HTML for fast delivery. In contrast, the object cache stores complex SQL queries to reduce the load on the database.
The browser cache stores images and scripts locally on your computer. This saves you time on future visits.
These elements influence your overall visual structure.
You must therefore target the right level of caching. This is the only way to finally see your latest changes.
Understanding the Impact of Caching on Speed and SEO
Your site’s performance is tied to Core Web Vitals. An effective cache reduces Time to First Byte (TTFB), which measures server responsiveness.
The right tools can significantly improve WordPress speed. Yet many website creators still overlook this simple but useful setting for their visibility.
3 Plugins to Clean Up Your Data
Beyond the theory, how do you take action from your dashboard?
Use the settings in WP Rocket or LiteSpeed Cache
The quickest method is to use the “Clear Cache” button. This shortcut is located right in the top toolbar of WordPress. It’s ideal for an immediate cleanup.
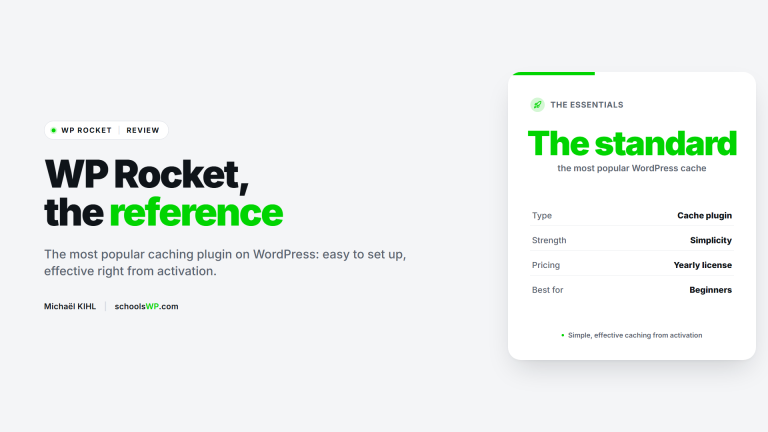
To better understand the tool’s interface, check out my guide on what WP Rocket is. There, you’ll find a detailed breakdown of each option.
Here are the available purge options:
- Global purge via the Dashboard tab.
- Individual purge on a specific page.
- Automatic purge after an update.
Note that LiteSpeed often requires a separate purge of generated CSS files. Be sure to check this.
Other popular plugins offer the same button: W3 Total Cache, WP Super Cache, or WP Fastest Cache. The process is the same; only the button’s location changes.
| Cache Level | Tool Used | Target User |
|---|---|---|
| Plugin Level | WP Rocket / FlyingPress | Beginner |
| Server Level | Hosting Dashboard / Nginx | Intermediate |
| Terminal Level | WP-CLI | Developer |
Force a local refresh and use incognito mode
The browser also stores files on your computer. Use the shortcut Ctrl+F5 or Cmd+Shift+R. This forces Chrome or Firefox to ignore its local cache and load the page from scratch.
Incognito mode is your best ally. It always starts with an empty cache. It’s perfect for checking how your site actually looks, without interference from your old data.
- Chrome: Ctrl+F5
- Firefox: Ctrl+Shift+R
- Safari: Option+Cmd+E
Use this simple diagnostic test. You’ll quickly find out whether the issue is coming from your computer or the remote server.
Clearing the WordPress Cache Without a Plugin
You don’t always need a plugin to clear your cache. Some built-in or manual methods do the job. This is handy if you want to limit the number of plugins you use or need to take urgent action.
The first option is your hosting provider’s cache. Many servers manage the cache without a plugin (LiteSpeed, Nginx, Varnish). You can clear everything from your hosting control panel in just a few steps.
The second option is WP-CLI. The `wp cache flush` command clears the object cache in a single line, without installing anything. This is ideal if you’re comfortable using the command line.
The last option is FTP. If you no longer have access to the admin panel, connect using FileZilla. Delete the contents of the `wp-content/cache` folder, without deleting the folder itself.
Clearing a CDN’s Cache (Cloudflare)
If you’re using a CDN like Cloudflare, it also keeps a copy of your pages. Clearing the WordPress cache isn’t enough. You’ll also need to purge the CDN.
On Cloudflare, go to the Caching tab, then Configuration. Click “Purge Everything” to clear everything. For a single page, use “Custom Purge” with its URL.
Be sure to purge the CDN after a major design change. Otherwise, your visitors will still see the old version served by the network.
Purging or clearing the cache: what’s the difference?
Both terms often refer to the same action: deleting stored temporary files.
« “Purge” » and “«” “clear” » are interchangeable in most plugins.The real distinction lies elsewhere. Clearing the entire cache rebuilds every page. Flushing a single page affects only that page. Choose the appropriate action based on what you’ve modified.
The cache isn’t clearing: what should you do?
Sometimes, you clear the cache but the old version remains. The culprit is often another layer: the browser cache, the CDN, or the server cache. Clear them in this order: plugin, server, CDN, browser.
Also check your minification settings. A combined CSS or JS file may remain static. Regenerate it, then test in incognito mode to see how it actually renders.
Manage your cache clears intelligently to keep your site performing well
Clearing the cache is useful, but doing it compulsively can harm your user experience.
Identify key times for manual purging
Manual purging becomes necessary after a theme update. This is also the case if you modify the functions.php file or your SEO settings. These actions often cause the site to stop loading.
To manage multiple sites with ease, check out my review of WP Umbrella. This tool centralizes your maintenance tasks.
Be mindful of performance. A full purge increases the TTFB, as your server must then rebuild every page.
Target your actions. Focus on cleaning up just the single page you modified. It’s much more efficient.
Configure exclusions for dynamic pages
The WooCommerce cart and the member area are sensitive areas. They display data that’s unique to each session. Caching them would break their functionality.
Open your plugin’s settings. Add the relevant URLs to the exclusions tab. You can also filter by cookies for greater precision.
Be vigilant. Check these settings after adding a transactional plugin. This is an essential security measure.
Mastering how to clear the server, object, and browser caches ensures your updates are displayed while preserving your Core Web Vitals. Use your plugins or the command line to synchronize your changes. A fast, up-to-date site remains your best asset for long-term conversions.
FAQ: Clearing the WordPress Cache
Answers to the most frequently asked questions about the WordPress cache.
Want a fast WordPress site without spending your evenings tweaking settings? Get my performance tips by email – just a few minutes a week.